
Creating your account
From sign-up to a fully secured, identity-verified Simplifi account
Setting up your Simplifi account takes only a few minutes. The flow walks you through four guided steps — email validation, identity verification, two-factor authentication, and certificate request — so that by the end you can sign documents at QES level with full legal value.
Step 1 — Sign up
Go to the Simplifi sign-in page and click Sign up. You can continue with Google or Microsoft, or create a classic account with your email and a password. Fill in your first and last name exactly as they appear on your ID document — these will be used later for identity verification and on your qualified certificate.
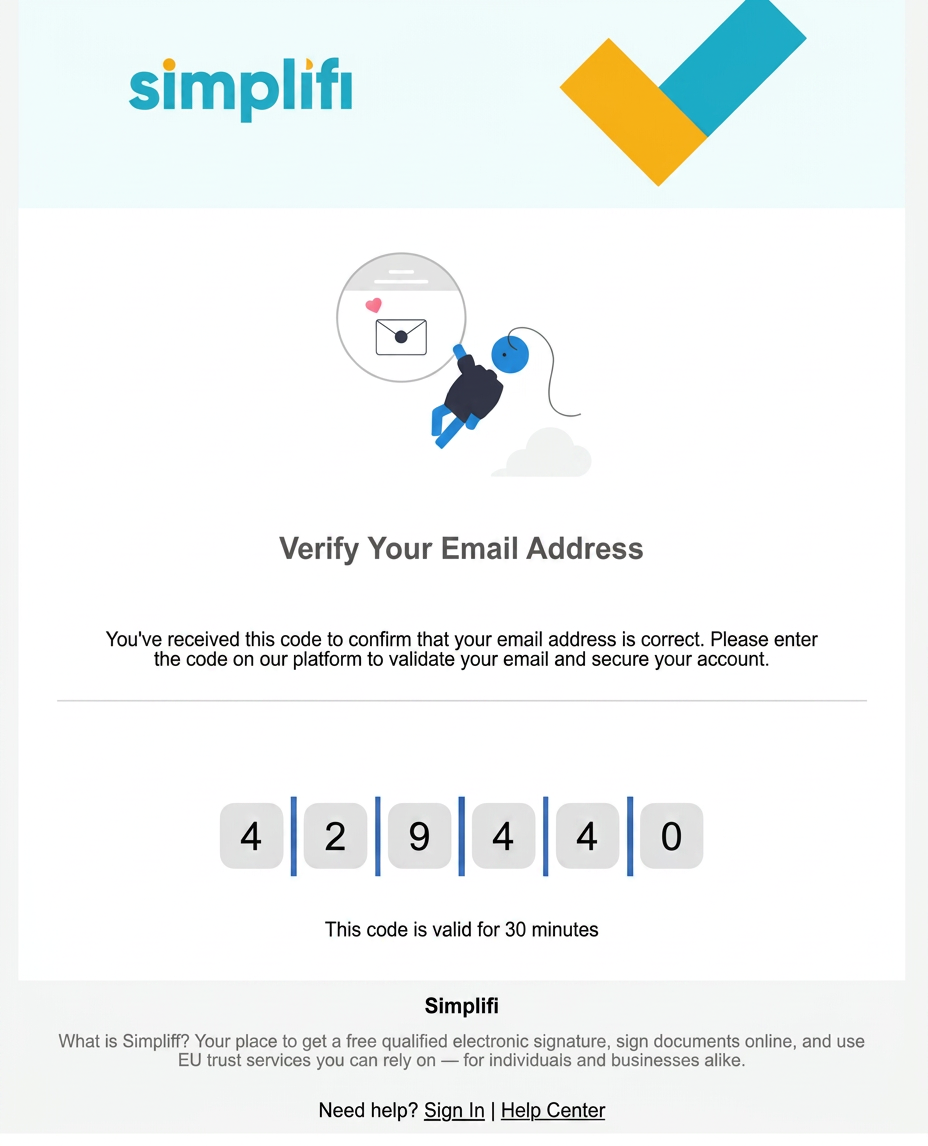
Step 2 — Verify your email
Right after sign-up, Simplifi sends a verification code to your inbox. Open the email titled "Action Required: Verify Your Email Address", copy the 6-digit code and paste it back into the Validare Email screen. The code is valid for 30 minutes — if it expires, just click "Resend".
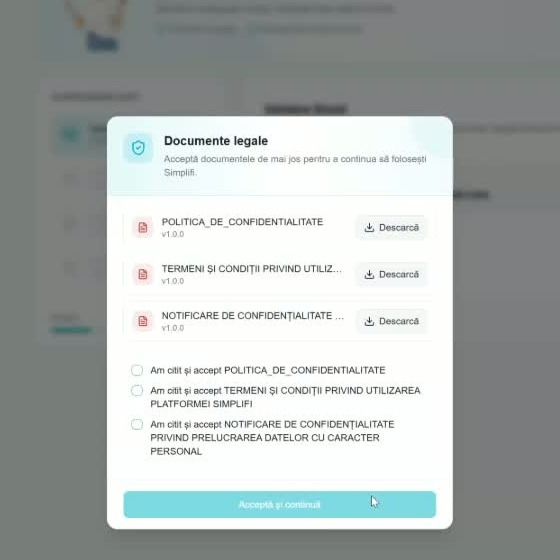
Step 3 — Accept the legal documents
Before continuing, review the Privacy Policy, Terms & Conditions and Personal Data Notice. You can download each PDF for your records, then tick the three confirmation boxes and click "Accept and continue". This is a one-off step and is required to enable signing on the platform.
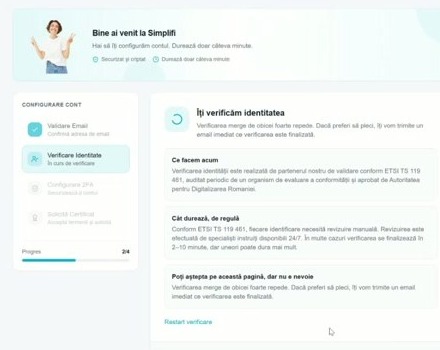
Step 4 — Verify your identity
Identity verification is performed by our qualified validation partner in line with ETSI TS 119 461 — the same standard that backs your future Qualified Electronic Signature. You'll be asked for a photo of your ID document and a short live selfie, and the check typically completes in 2–10 minutes. Note: for ID cards without an electronic chip, verification involves a manual review and may take up to 1 working day. You don't need to stay on this page — Simplifi emails you the moment the check finishes.
Step 5 — Enable two-factor authentication (2FA)
2FA adds a second layer of security to every sensitive action — signing, sharing, managing your certificate. It's mandatory and takes under a minute.
a. Install an authenticator app on your phone — Google Authenticator, Authy, Microsoft Authenticator, 1Password or LastPass all work. Any TOTP-compatible app is fine.
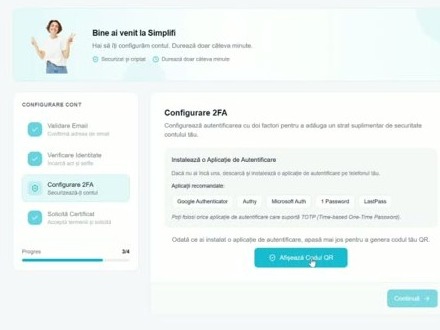
b. Click "Show QR code" in the Configurare 2FA step. Scan the QR with your authenticator app — it will instantly add a new "Simplifi" entry. If you can't scan, copy the manual key shown under the QR.
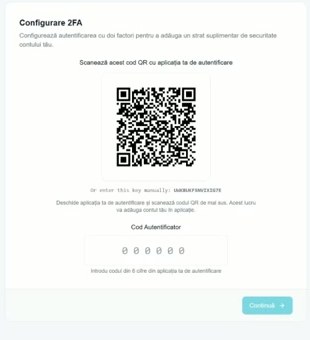
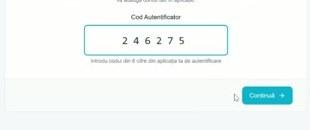
c. Type the 6-digit code your app generates into the Cod Autentificator field and click Continue. From now on, Simplifi will ask for a fresh code each time you sign in or perform a sensitive action.
Step 6 — Request your certificate
Once 2FA is active, the final step asks you to confirm the terms for issuing your qualified certificate. Accept and submit — the certificate is issued immediately and you are automatically enrolled in the free forever plan. You can upgrade anytime to one of the paid plans at www.simplifi.ro/preturi.
Tips & best practices
Use a permanent email address
Your Simplifi account is tied to your identity. Use an email you'll keep long-term — ideally a personal address, not a temporary work one.
Have your ID document ready
Before starting identity verification, place your ID (passport, national ID or driving license) on a flat, well-lit surface. Make sure all corners are visible.
Back up your 2FA
Store the manual key shown under the QR code in a password manager. If you change phones, you'll be able to re-add Simplifi without resetting 2FA.
Lost your 2FA?
You can reset it yourself from Account details → Security → Reset 2FA. You'll be asked to re-verify your identity (photo of your ID + a short selfie) before pairing a new authenticator.
Need help?
If identity verification fails, your authenticator app doesn't show a Simplifi entry, or your certificate is taking longer than expected, our support team can help in minutes.